 Guides
 Dangers
- If your not gas safe registered, you will kill someone.
- Help Forum
If in doubt call a professional!!
Keston C55, tips, tricks, advice and notes
READ THE DANGERS SECTION
The idea of this is so you get an idea of your boiler, so you know if your engineer is doing his job correctly.
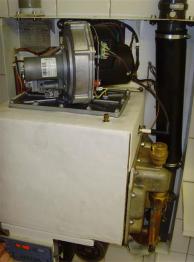
Ok, so as usual the pictures are a bit naff, but I hope it helps. Lets first start by NOT complaining about this boiler. It has its place, pound for pound it gives the most output you can get, and it can be fitted into incredibly difficult places. Overall, having this fitted will have saved you money, it has its faults though......
None of this is any particular order, so read through it and pick out what you need.
The juicy stuff - fan faults etc are at the bottom.
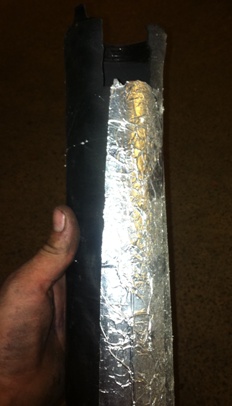
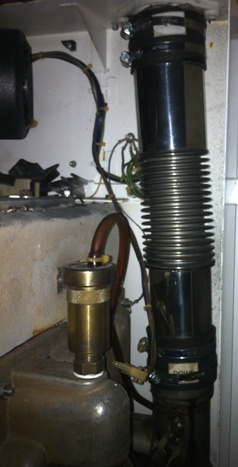
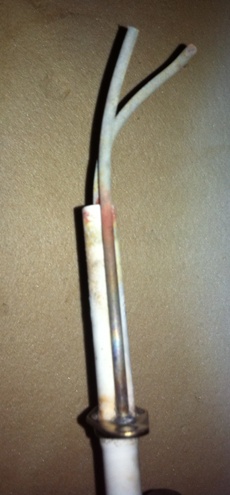
Flue - this is now attempt three to resolve this issue - originaly the flue tube was a corrugated rubber effort, reinforced with wire, which was actualy better than version two, a degraded one shown here, which was a smooth rubber tube, now we have a stainless item with rubber ends, if the latest one is any better time will tell - we all thought version 2 was fine..... till they started to fall appart. Honestly though, it looks good. The metal version is shown next, or on my blog. Never run this boiler with a degraded flue tube. A modern boiler produces about 100 ppm of carbon monoxide, while running normaly.... Its going to kill you.
This one is showing the signs of distress - white / grey sections and loss of flexibility.
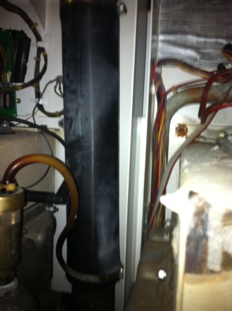
This is what a new one looks like!
Ignitors - need to be changed every year realy - mainly due to the porcelain tracking, but this is an extreme example of what happens if you dont. The ideal gap between the tips is the thickness of a £1 coin. You know if its an ignitor problem, as you will see the spark jump from the ignitor HT cap along the white insulator..... try cleaning the porcelain with raw alchol as a temporary measure.

This is what a new one looks like!
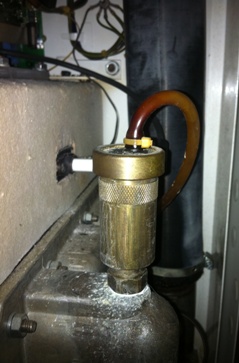
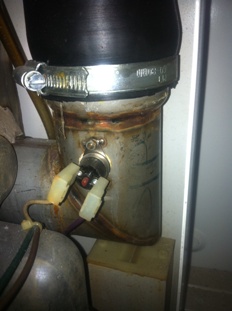
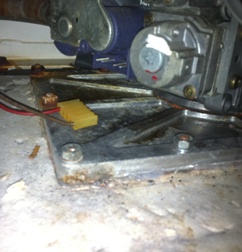
Leaks from the auto air vent tube...... see the gold thing? it vents air in the heat exchanger - and any drips run down the little clear tube. If it plugs up, it will leak continuously. New versions have the pipe run into the condensate trap - (clever) old ones have it on the boiler base, loose. Either way, a 3/8" AAV from a plumbers merchant will fit. Keston have mounted into a auto close widget. You should be able to unscrew it without draining the system, and the widget will close off the connection as the AAV is removed. be careful, it doesnt always close, so do it with the boiler cold. Unscrew the round bit, not the nut lower down.
Leaks from heat exchanger end caps..... If you think yours isnt leaking, turn it off and let it go cold, then get back to me....... The heat will hide a lot of drips! You cant realy do much about this.... you can try nipping up the 10mm nuts.... but it never helps much..... you can buy these gaskets cheaply, but you need to remove the heat exchanger totaly to change them, unless you brutalise the case sides (not recommended) If your told you need a new heat exchanger because of this, remember, if it just leaks, and isnt more than that (ie it hasnt ruined the rest of the boiler) then to do either job, the heat exchanger has to be removed........ so do the seals! I regularly see these boilers run with the case off, to stop the water leak evaporating and getting into the fan / PCB etc....... I do not advise this as it compromises the boilers 'room sealed' status...... but I do see it often.
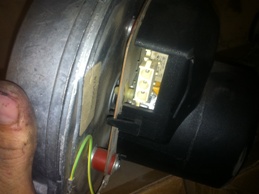
PCB - ha! mexican made im told, and the plastic casing cant handle the heat, which degrades, and the heavy transformer rips the board off its case and drops it onto the heat exchanger. If its still working fine, keep the old board, as, when it goes again (yeah I know) you may be able to use the old casing with the old old board (if you see what I mean). PCB's do go. No lights on display board and fan running flat out is the classic sign of this.
This is the flue overheat stat - see the central little red button - press to reset. HOWEVER, if this has gone off, something major else is wrong - system empty or air lock or pump failure or overgassing - this shows a fairly major fault.
Casing overheat fuse - this little gubbins is a pain in the a*&se ..... its a thermal fuse, and serves two purposes, one - to kill the power to the boiler if the casing temperature rises too high, two, to offer a lovely exposed bit of wire at 240v to brush against...... be warned. It lives in the top left hand corner, and if it goes its usualy due to a busted flue tube, or all the white heat exchanger insulation fallen off. Anyway, if your getting no power to anything, check continuity accross this. Do not bypass.
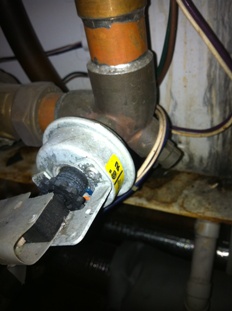
This is the low water pressure switch..... To be fair it doesnt behave too badly, considering where it is, check the little push pin is closing the microswitch, if not, drain boiler, and try cleaning the sludge from the elbow or the hole that runs up the thread into the diaphragm chamber. Remove from boiler first obviously.
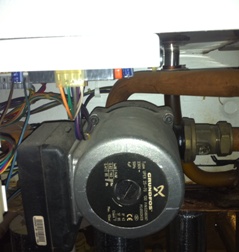
Pump - very unusual for this to fail.... be mildly suprised if it does. Kestons are very forgiving when it comes to sludge.... VERY.
Burner gasket........ does your boiler stink of gas when the casing is off? probably this.... This fine example shows a lovely hole, which will be gushing out a lovely premix of gas and air, perfect for an explosion. Look closely at this example to see the clear silicone used to try to reseal the burner - probably a service done when 'unprepared' - never remove the fan, burner or gas valve without new gaskets ready, they cannot be reused.
This is the underneath of the burner cover - it must be cleaned fully of old gasket before its put back
TIP - to check if a burner gasket is leaking, spray leak detection fluid around the gasket when fan is running - but this only works when boiler is cold - as it warms up it WILL bubble - as the LDF heats up - so test cold, be sure, then run.
The top of the heat exchanger - same deal - try not to wreck the insulation, and dont drop crud into burner or heat exchanger. Do not try to lever out the burner until you have removed the gasket or you will bend it, and it will leak.
Burner - inspect for holes - it must be totaly uniform, smooth and have no holes, bare spots or burns. White deposits are fine and can be removed by running it under a tap - idealy in the direction of usual flow. FYI - this one is knackered - it has a hole.

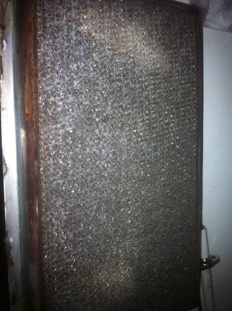
Heat exchanger flueways - clean by running water through.... it will flow out through the condensate drain - clearing that too - bonus!

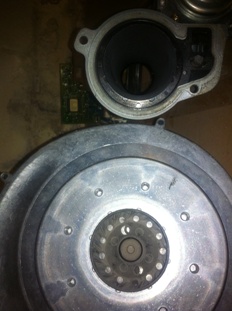
Fan gasket - this is what happens if you replace the fan but not the gasket - by rights this should have caused an exposion.

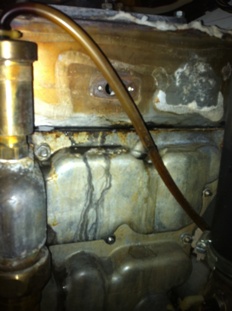
Condensate trap - the orange pipe on the bottom of this pic shows the pipe to the condensate trap - this is a common blockage spot....... usualy it can be massaged to clear.....
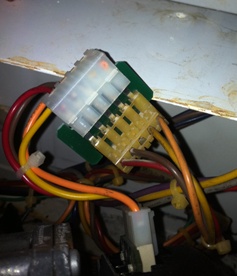
Fan - ok, if the display shows anything, and the fan is running flat out, its usualy the fan. The main issue is usualy the fan speed control - it cant get the fan speed low enough to fire..... A trick is to pull out this wire (main power to fan) as it starts to fire up and let the fan slow, jabbing it back in as the fan almost stops for a second then removing it again - this lets the fan 'rev counter' tell the pcb all is ok and it can proceed to run. It takes a bit of practice and you can end up with explosive ignition, but if you time it right the boiler can be made to run, usualy for a while - somehow the speed control improves for a little while after it manages to run once. Anyway, what i usualy do is get it to run like this, explain the problem to the client as it heats up the house, then turn it off, and go and get another fan.
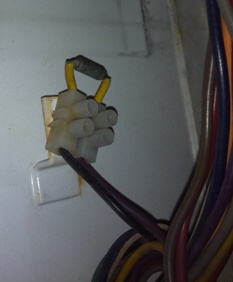
A new fan is an expensive item - especialy considering the only fault is the speed controller... a small pcb on the fan....And you will have to buy an entire fan...... an option to consider is contacting ADLINK in west london, who recondition boiler spares at very reasonable prices, yes thats right, a personal recomendation from me, dont expect many of those. They are, in short, a shed full of ladies, (and some gents) who recondition PCB's and fans and stuff all day long..... Note - the picture here shows the NEW fan, and adaptor harness.... if you have this, you need to tell them - a kit from Parts centre will have all the right bits - at a price.
I have, once, seen the fan shatter at the drive spigot - centre of shiny disk - you will know because it will make a horrible noise. Consider buying a broken fan off ebay and fitting your internal PCB to it......
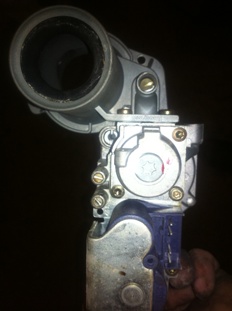
Adjustments - min gas is under the star drive cap - where the governer is, Max gas is the screw (brass) above it down the aluminium tube.
Note - max gas adjustment doesnt affect the min, but min gas adjustment affects the max. Be aware.
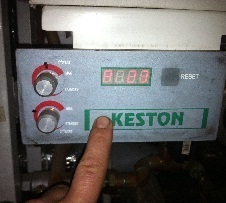
To adjust CO2 values you need to set the boiler to max or min rate. The control buttons are a bit hidden - there are five buttons - either underneath the 'Keston' badge on the display board, or under the letters themselves. It can be a bit tricky.
Max burn - hold buttons 1 & 4 till 'H' appears
Low burn - hold buttons 1 & 5 till 'L' appears
If you get anything else, press reset!
Button 1 is under the 'K' the 5 is under 'N'.
The figures you need to acheive are
CO2 max - 8.6-9%, CO 50-150ppm - Max adjust clockwise to lower CO2
CO2 Min - 8.3-8.5%, CO 5-20ppm - Min adjustment Anti clockwise to lowe CO2
Note - max gas adjustment doesnt affect the min, but min gas adjustment affects the max. Be aware.
Reset gets you out of the max / min service setting.
BTW - the other buttons do something - no idea what!
Keston C55 / C45 /C40
- The C45 is the replacement to the C40, same boiler
- When your boiler starts to play up, especialy if it leaks, consider replacing it with another - ie new keston, and keep the old boiler for spares.... that way you spend the most on materials and least on labour.
- Unfortunately the flue needs replacing when the boiler is changed..... aaahhhmmmm..... not many people do tho.
- Under the new flue in void rules, keston are in a tricky place, if you ask me, the flue needs to be visible every 1.5 meters..... others disagree.